

Introduction
Perlin Noise is a form of gradient noise used extensively in visual applications. Developed by Ken Perlin in 1983, the Perlin Noise algorithm creates randomness with a structure. Perlin Noise was initially used in the 1982 movie 'Tron' to generate natural appearing textures on computer-generated surfaces in the animation sequences. In modern days, it is used from simple art generation to terrain generation in video games. In this article, we will try to generate art using Perlin Noise.
Implementation
Setting Up
As usual, we will be using the Processing platform. We will start by defining a setup() and draw() function. In the setup() function, we will set the size and colour mode as follows.
  size(600, 600);
  colorMode(HSB);
In the draw() function, we will add a black background and a noStroke.
  background(0);
  noStroke();
Perlin Noise
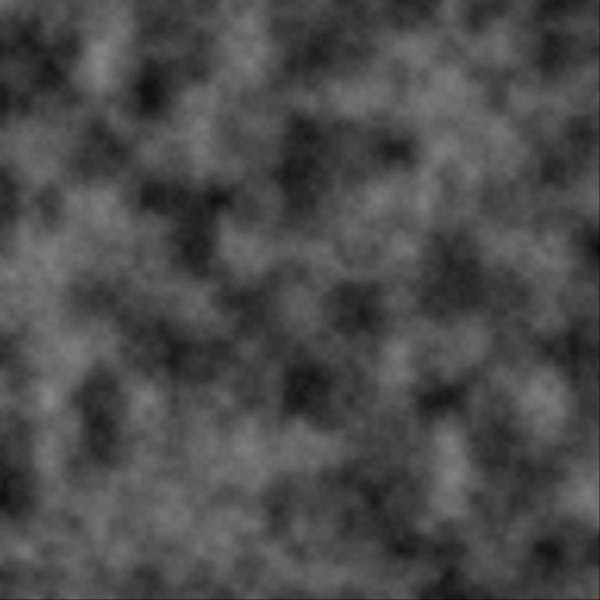
After this, we will implement the Perlin Noise in Processing. For our convenience, Processing has included Perlin Noise as a generic function which can be accessed by noise(). Perlin noise can be accessed in any dimension we desire. For this example, we will go with 2D Perlin Noise as it is a 2D art. Each time the sketch is run, Processing generates a massive Perlin Noise space for us. We can then use the noise() function to access the noise value at a single point in this space. However, if we want multiple Perlin Noise spaces in the same code, we must either generate a whole new space or change the area from which we access the noise. Thus, we will use the noiseSeed((int)random(100)); function to change the centre of the Perlin Noise space to a random place.
As a global variable, we will define sampleDistance as a float value of 0.02. This will be the distance between the points we sample the Perlin Noise. What's useful about Perlin Noise is that the closer you sample the values, the smoother the randomness becomes. You can play around with this value to see this in action.
Now we will start the actual sampling. For this, we will have two nested 'for' loops. This will act as our x and y-axis values of the points for the pixels in the window. Thus for each point, we will sample the noise space at sampleDistance intervals. Then we will map the noise value, received in the range of 0 and 1 to 0 and 255. This mapped value will be used to set the brightness of that point. This will create a visualization of Perlin Noise. The code is as follows.
  for(int i = 0; i < width; i++) {
    for(int j = 0; j < height; j++) {
      float noiseSample = noise(i * sampleDistance, j * sampleDistance);
      int brightness = (int)map(noiseSample, 0, 1, 0, 255);

      fill(brightness);
      circle(i, j, 1);
    }
  }
Additionally, we will add a noLoop() at the end to stop the sketch from looping and use loop() to again loop through when the mouse is clicked.
Adding Some Colour
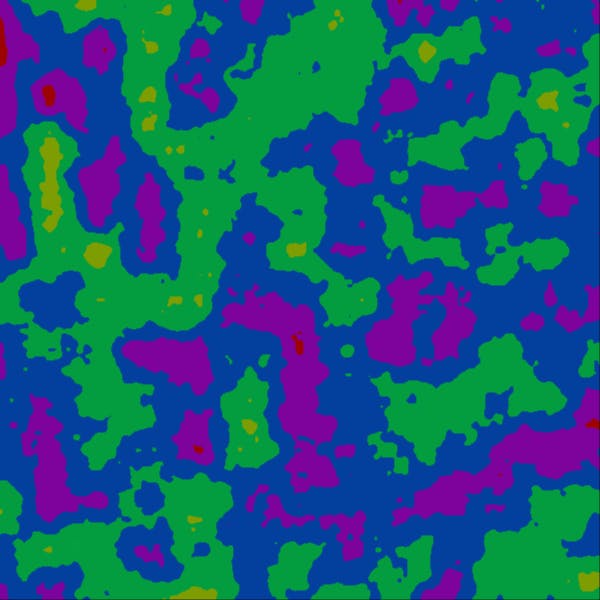
Since this is quite boring, we will add some colour to this. First, instead of adding continuous colours to the points, we will add discrete colour steps. For this, we will first define hues as an integer array as a global variable. This will hold five steps of our liking between 0 and 255. We can change these values if we prefer. We can even add more steps as well.
int[] hues = {51, 102, 153, 204, 255};
We will also change the colour mode to HSB at setup by colorMode(HSB).
Here, instead of directly mapping the output noise value from 0 to 255, we will map it from 0 to the number of steps we defined above. Then we will get the corresponding hue step from the hues array using this number. Thus the modified code is as follows.
int hueID = (int)map(noiseSample, 0, 1, 0, hues.length);
fill(hues[hueID], 250, 250);
With this, we get a discretely incrementing step-like pattern.
Working with a Palette
Next, we will use a colour palette instead of hue steps. For this, we will first define the palette as a global variable with the colour values we desire. Next, we will replace hues with palette in the code. Now instead of hue steps, we will get colours from a predefined colour palette.
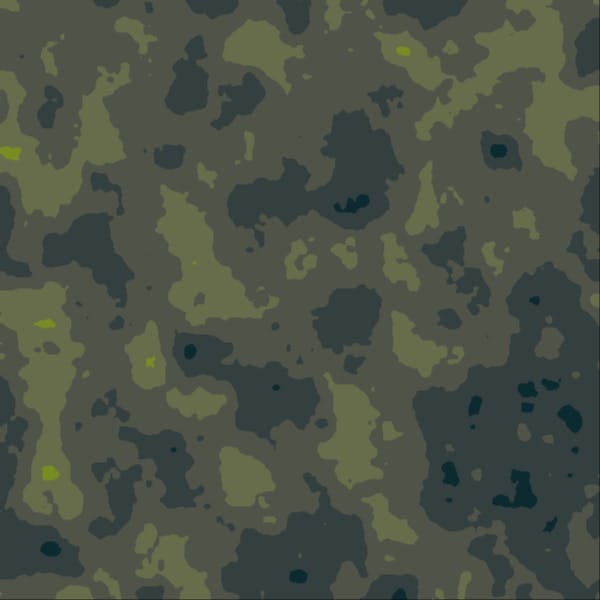
Multiple Colours
To add a bit more flair, we will use the same palette multiple times. What we do here is that instead of only using the x number of colours once, we will use them multiple times. For example, let's say we defined 5 colours. Now, instead of mapping the noise value from 0 to 4, we will map it from 0 to 9. Now in the colouring stage, we will use modulus to select only the five colours reusing the same palette both from 0 to 4 and 5 to 9.
For this, we will first define how many times we need to reuse the palette as multiple as a global integer. After this, the changed code will be as follows.
int colourID = (int)map(noiseSample, 0, 1, 0, palette.length * multiple);
fill(palette[colourID % palette.length]);

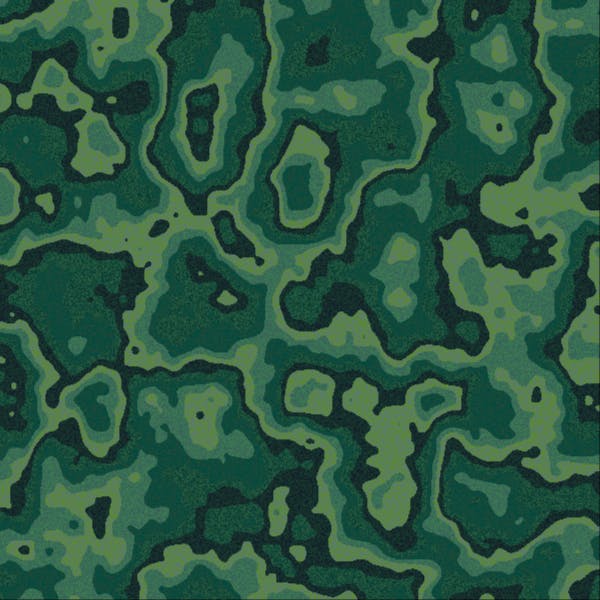
Colour Noise
We will now add a bit of colour noise. For this, we will add multiple palettes. (color[][] palette) But when we get a colour from the palette colours, we will also choose the palette at random. This will create a grainy effect on the image.
int colourID = (int)map(noiseSample, 0, 1, 0, palette[1].length * multiple);
fill(palette[(int)random(palette.length)][colourID % palette[1].length]);
Conclusion
There are more interesting things that we can do with Perlin Noise. We can add animations, change colour palettes, change sampling differences, etc. With this, we will end this article though. As usual, you can find the code in the Github Repository.
External Links:
- Github Repository with the Processing Code: Github Repository
- Wikipedia article on Perlin Noise: wikipedia.org